Types of Data Augmentation
Data Augmentation is a regularization technique that's used to avoid overfitting when training Machine Learning models. Although the technique can be applied in a variety of domains, it's very common in Computer Vision, and this will be the focus of the tutorial.
Adjustments are made to the original images in the training dataset before being used in training. Some example adjustments include translating, croping, scaling, rotating, changing brightness and contrast. We do this to reduce the dependence of the model on spurious characteristics; e.g. training data may only contain faces that fill 1/4 of the image, so the model trainied without data augmentation might unhelpfully learn that faces can only be of this size.
After defining some utility functions to visualise the example images, this tutorial details each different augmentation that can be used to adjust both the position and the colors of images. We discuss augmentations that are combined into single functions, and conclude with a FAQ section.
%matplotlib inline
from matplotlib.pyplot import imshow
import mxnet as mx  # used version '1.0.0' at time of writing
import numpy as np

mx.random.seed(42) # set seed for repeatability
We define a utility function below, that will be used for visualising the augmentations in the tutorial.
def plot_mx_array(array):
    """
    Array expected to be height x width x 3 (channels), and values are floats between 0 and 255.
    """
    assert array.shape[2] == 3, "RGB Channel should be last"
    imshow((array.clip(0, 255)/255).asnumpy())
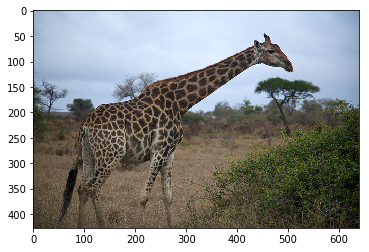
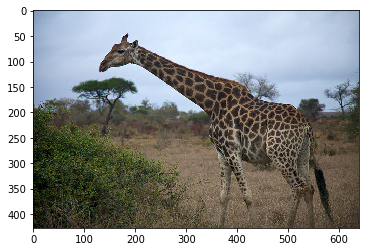
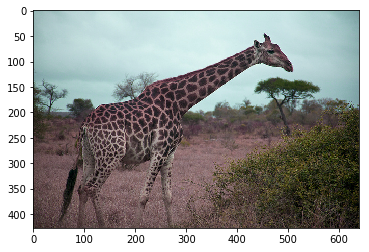
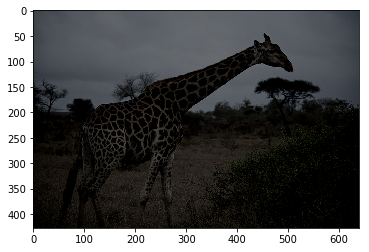
We load an example image, this will be the target for our augmentations in the tutorial.
mx.test_utils.download('https://raw.githubusercontent.com/dmlc/web-data/master/mxnet/doc/tutorials/data_aug/inputs/0.jpg')
example_image = mx.image.imread("0.jpg")
assert example_image.dtype == np.uint8
You'll notice that the image is loaded with with numpy.int8 datatype. Some functions such as swapaxes don't work on int types, so we'll convert to float32, and visualize.
example_image = example_image.astype("float32")
plot_mx_array(example_image)
Position Augmentation
One form of augmentation affects the position of pixel values. Using combinations of slicing, scaling, translating, rotating and fliping the values of the original image can be shifted to create new images. Some operations (like scaling and rotation) require interpolation as pixels in the new image are combinations of pixels in the original image.
Crop
You can use mxnet.image.RandomCropAug and mxnet.image.CenterCropAug to create instances of the Augmenter class, which can be called just like a function.
It's worth noting that the randomisation for RandomCropAug happens when calling the Augmenter, and not at the point of instantiation. You'll end up with different images each time you call the Augmenter, so it can't be used to apply the same augmentation to another image. You can use mxnet.random.seed for random but repeatable augmentations.
CenterCropAug is determanistic and just takes the most central crop of given size.
aug = mx.image.RandomCropAug(size=(100, 100))
aug_image = aug(example_image)
plot_mx_array(aug_image)

assert example_image.shape == (427, 640, 3)
assert aug_image.shape == (100, 100, 3)
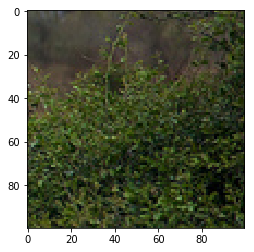
Watch Out! Crop are a great way of adding diversity to your training examples, but be careful not to take it to the extreme. An example of this would be cropping out an object of interest from the image completely. Visualise a few examples after cropping to determine if this will be an issue.
If you're training object detection models, it's recommended that you use the mxnet.image.DetRandomCropAug augmenter. Instead of the size parameter, it has parameters such as min_object_covered to prevent this issue.
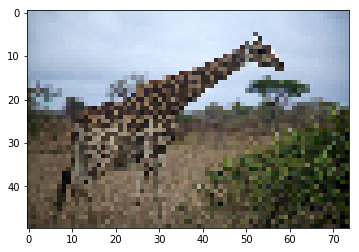
Resize
Use mxnet.image.ResizeAug and mxnet.image.ForceResizeAug for scaling the image.
mxnet.image.ResizeAug scales the shortest edge to the defined size, and automatically adjusts the longest edge to maintain the aspect ratio of the input image.
mxnet.image.ForceResizeAug scales both height and width to the defined size, even if this doesn't preserve the aspect ratio.
aug = mx.image.ResizeAug(size=50)
aug_image = aug(example_image)
plot_mx_array(aug_image)

assert example_image.shape == (427, 640, 3)
assert aug_image.shape == (50, 74, 3)
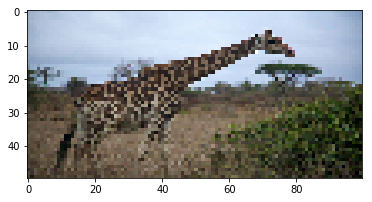
Watch out! size should be (width, height).
aug = mx.image.ForceResizeAug(size=(100, 50))
aug_image = aug(example_image)
plot_mx_array(aug_image)

assert example_image.shape == (427, 640, 3)
assert aug_image.shape == (50, 100, 3)
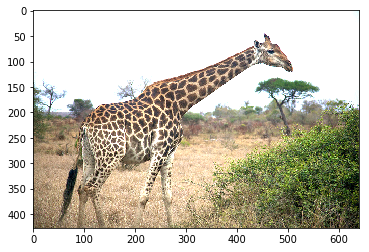
Horizontal Flip
Use mxnet.image.HorizontalFlipAug to flip the image horizontally, where p is the probability of a flip occurring.
We set p=1 here to demonstration the effect, but in practice you'd choose a float between 0 and 1 (e.g. 0.5).
aug = mx.image.HorizontalFlipAug(p=1)
aug_image = aug(example_image)
plot_mx_array(aug_image)

assert example_image.shape == (427, 640, 3)
assert aug_image.shape == (427, 640, 3)
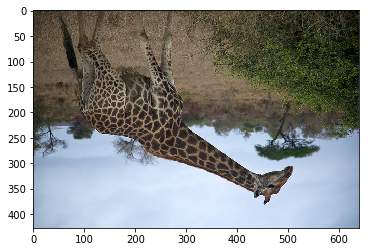
You can get a random vertical flip too using mxnet.NDArray.swapaxes (to switch height and width) before and after the random horizontal flip. Once again p will be the probability of a flip occurring, and is set to 1 for demonstration purposes.
aug = mx.image.HorizontalFlipAug(p=1)
aug_image = aug(example_image.swapaxes(0, 1)).swapaxes(0, 1)
plot_mx_array(aug_image)
Color Augmentation
Another form of augmentation changes the pixel values, rather than the pixel positions. Since some of these functions don't have obvious implentations, code snippets have been provided for most augmenters.
Watch Out! Unlike with positional augmentation, the color augmentation functions edit the input images inplace. So you'll need to copy the image if you want to make augmentations on the same image independently.
Brightness
Use mxnet.image.mx.image.BrightnessJitterAug to add a random brightness jitter to images. Use the brightness parameter to control the amount of jitter in brightness, with value from 0 (no change) to 1 (potentially large change). brightness doesn't specify whether the brightness of the augmented image will be lighter or darker, just the potential strength of the effect. Specifically the augmentation is given by:
alpha = 1.0 + random.uniform(-brightness, brightness)
image *= alpha
example_image_copy = example_image.copy()
aug = mx.image.BrightnessJitterAug(brightness=1)
aug_image = aug(example_image_copy)
plot_mx_array(aug_image)
Contrast
Use mxnet.image.ContrastJitterAug to add a random contrast jitter to an image. Contrast can be thought of as the degree to which light and dark colours in the image differ. Use the contrast parameter to control the amount of jitter in contrast, with value from 0 (no change) to 1 (potentially large change). contrast doesn't specify whether the constrast of the augmented image will be higher or lower, just the potential strength of the effect. Specifically the augmentation is given by:
coef = nd.array([[[0.299, 0.587, 0.114]]])
alpha = 1.0 + random.uniform(-contrast, contrast)
gray = image * coef
gray = (3.0 * (1.0 - alpha) / gray.size) * nd.sum(gray)
image *= alpha
image += gray
example_image_copy = example_image.copy()
aug = mx.image.ContrastJitterAug(contrast=1)
aug_image = aug(example_image_copy)
plot_mx_array(aug_image)
Saturation
Use mxnet.image.SaturationJitterAug to add a random saturation jitter to an image. Saturation can be thought of as the 'amount' of color in an image. Use the saturation parameter to control the amount of jitter in saturation, with value from 0 (no change) to 1 (potentially large change). saturation doesn't specify whether the saturation of the augmented image will be higher or lower, just the potential strength of the effect. Specifically the augmentation is using the method detailed here.
example_image_copy = example_image.copy()
aug = mx.image.SaturationJitterAug(saturation=1)
aug_image = aug(example_image_copy)
plot_mx_array(aug_image)

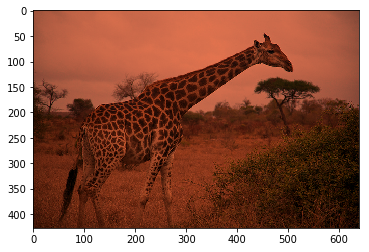
Hue
Use mxnet.image.HueJitterAug to add a random hue jitter to images. Hue can be thought of as the 'shade' of the colors in an image. Use the hue parameter to control the amount of jitter in hue, with value from 0 (no change) to 1 (potentially large change). hue doesn't specify whether the hue of the augmented image will be shifted one way or the other, just the potential strength of the effect. Specifically the augmentation is using the method detailed here.
example_image_copy = example_image.copy()
aug = mx.image.HueJitterAug(hue=0.5)
aug_image = aug(example_image_copy)
plot_mx_array(aug_image)
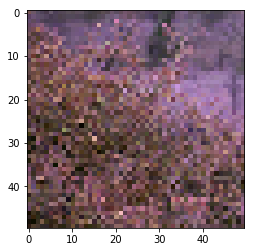
LightingAug
Use mxnet.image.LightingAug to add PCA based noise, using the following method:
alpha = np.random.normal(0, alphastd, size=(3,))
rgb = np.dot(eigvec * alpha, eigval)
image += nd.array(rgb)
example_image_copy = example_image.copy()
aug = mx.image.LightingAug(alphastd=100, eigval=np.asarray([1,1,1]), eigvec=np.ones((3,3)))
aug_image = aug(example_image_copy)
plot_mx_array(aug_image)
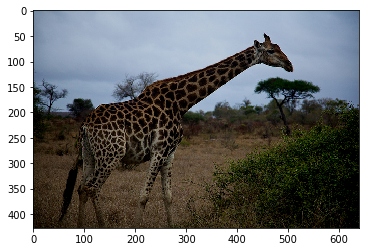
Color Normalization
Given a per channel mean and standard deviation, mxnet.image.ColorNormalizeAug will normalise the values on each channel, as given by:
if mean is not None:
    image -= mean
if std is not None:
    image /= std
example_image_copy = example_image.copy()
mean = [0, 10, 20]
stdev = [1, 2, 3]
If you calculate the true mean of the image, each channel in the output will be 0 centered. And if you calculate the true standard deviation, each channel in the output will have unit variance. Some arbritary mean and stdev values have been picked for demonstration.
aug = mx.image.ColorNormalizeAug(mean=mean, std=stdev)
aug_image = aug(example_image_copy)
plot_mx_array(aug_image)
Grayscale
Use mxnet.image.RandomGrayAug to randomly remove the color from the image. p is the probability of a greyscale occuring.
We set p=1 here to demonstration the effect, but in practice you'd choose a float between 0 and 1 (e.g. 0.5).
example_image_copy = example_image.copy()
aug = mx.image.RandomGrayAug(p=1)
aug_image = aug(example_image_copy)
plot_mx_array(aug_image)

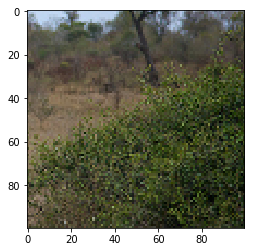
Combinations
Some shortcut functions are provided to perform multiple augmentation in a single function.
# A random crop, with a random resizing, and random aspect ratio jitter
example_image_copy = example_image.copy()
aug = mx.image.RandomSizedCropAug(size=(100, 100), area=0.1, ratio=(1.0, 1.5))
aug_image = aug(example_image_copy)
plot_mx_array(aug_image)

assert aug_image.shape == (100, 100, 3)
# A random brightness, contrast and saturation jitter in random order.
example_image_copy = example_image.copy()
aug = mx.image.ColorJitterAug(brightness=1, contrast=1, saturation=1)
aug_image = aug(example_image_copy)
plot_mx_array(aug_image)
And lastly, you can use mxnet.image.RandomOrderAug to apply multiple augmenters to an image, in a random order.
example_image_copy = example_image.copy()
aug_list = [
    mx.image.RandomCropAug(size=(250, 250)),
    mx.image.HorizontalFlipAug(p=1),
    mx.image.BrightnessJitterAug(brightness=1),
    mx.image.HueJitterAug(hue=0.5)
]
aug = mx.image.RandomOrderAug(aug_list)
aug_image = aug(example_image_copy)
plot_mx_array(aug_image)

assert aug_image.shape == (250, 250, 3)
FAQs
1) What shape should arrays/images be when using Augmenters?
Augmenters work with arrays of shape height x width x channel.
When working with ImageIters such as mxnet.image.ImageIter, you should perform the augmentations while iterating, rather than on the output of the iterator. ImageIter return images of shape 3 x height x width, so you would have to use mxnet.NDArray.swapaxes before applying Augmenters; hence why this later approach is not recommended. You can instead specify the augmentation steps in the constructor of the ImageIter, using the aug_list argument or **kwargs, and the dimension ordering will be handled for you.
Note: Some implicit augmentation may occur when using ImageIter. You must specify the data_shape in the constructor of the ImageIter, and if the height and width are different from the image source, it crops and/or scales. Scaling is applied equally in both height and width axes so image isn't streched.
2) What channel order should be used when using Augmenters?
MXNet's default is Red, Green, Blue (RGB), while OpenCV's default is Blue, Green, Red (BGR).
3) What value ranges should be used when using Augmenters?
Most Augmenters don't require values of a certain range. Some Augmenters (such as mxnet.image.ResizeAug and mxnet.image.BrightnessJitterAug) can output images with a larger value range than the input though. An example of this would be an image with values 0 to 255, where pixels already close to the range boundary might be shifted outside of the 0 to 255 range by a random brightness jitter. You'll notice that the plot_mx_array function clips values outside of the 0 to 255 range.
4) Are augmentations performed on GPU?
Most of the augmenters contain a mixture of control logic and NDArray operations. Although NDArray operations can be run on GPU, the control logic will still run on CPU which may limit performance. With Gluon DataLoaders you can specify num_workers to perform loading and augmentation in parallel with multiprocessing workers.
4) Can I implement custom augmentations?
Yes, you can implement your own class that inherits from Augmenter and define the augmentation steps in the __call__ method. You can also implement a dumps method which returns a string representation of the augmenter and its parameters: it's used when inspecting a list of Augmenters.
Can you improve this documentation? These fine people already did:
Sheng Zha, Tong He, kpmurali, ThomasDelteil & Thom LaneEdit on GitHub
cljdoc builds & hosts documentation for Clojure/Script libraries
| Ctrl+k | Jump to recent docs |
| ← | Move to previous article |
| → | Move to next article |
| Ctrl+/ | Jump to the search field |